

How To Deploy A React App To Heroku

![]()
Deploy Your React App To Heroku
Before you jump into this tutorial you do need to have a few things installed first before you can start.
🚨If your goal is to combine React UI + API (Node, Ruby, Python…) into a single app, then this tutorial is not the answer.
Requirements:
- Node / NPM — Click the link and download the installer
- Git — Click the link and download the installer
- Heroku CLI — Click the link and download the installer
Steps:
- Sign up for Heroku
- Setup our React App for deployment
- Create Heroku git repository
Step 1 — Sign up For Heroku
Visit Heroku for free hosting
This step explains itself, we need to sign up for Heroku before we can do any deployment. So head over to Heroku and sign up. Once you signed up make sure you head over to your email and confirm your account.
Step 2 — Setup React App
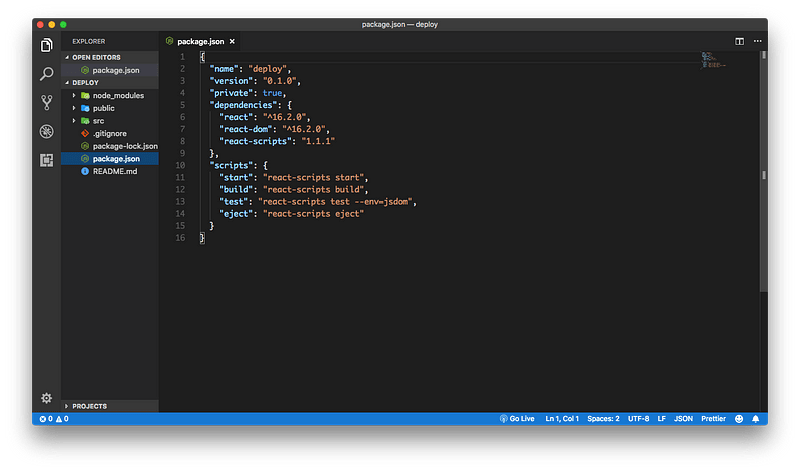
Open up your React app (I'm using create-react-app) and open up your package.json file. If your using create-react-app we're going to add a new object called engines. Inside of our engines object, we need to specify the versions for npm and node. To do this open up your terminal and type in:
- npm -v
Press enter
- node -v
Press enter
Your versions may be different than mine, but that's fine. Once you specified your engine versions save your file.
Step 3 — Create Heroku Git Repository
With your terminal still open navigate to your React app folder and change directory into it. Now we need to connect our project to Heroku. If you haven't already installed the Heroku CLI. To make sure it's installed correctly run this command:
- heroku --version
You should see your Heroku CLI version. Once that is installed we need to setup up Heroku git repository by running these commands:
- heroku login (Enter your Heroku credentials)
- git init
- git add .
- git commit -m "initial commit"
- heroku create (You should see two links after running this command. Copy the second one)
- git remote add heroku PASTE THE LINK YOU JUST COPIED
- git push heroku master
Once you run the last command Heroku will start to run some tests on your app. If everything goes right you should see a successful deploy message. Now you're able to navigate to your app by running:
- heroku open
Anytime you make changes to your app and want to re-deploy the only commands you need to run are:
- git add .
- git commit -m "any message goes here"
- git push heroku master
Easier Method 😁
Now that I made you go through all of that process, there is an easier method if you use Github. All you have to do is log into your Heroku account; click "new" then "create new app" and give your app a name. After clicking create you should be greeted with a dashboard for the app you just created. Navigate to the deploy tab and sync your Github account with Heroku. After syncing your Github account and can search for the repository you want to sync with Heroku by scrolling down to "App connected to Github" section and searching for the repository you want to sync. You can also set up automatic deployment, so every time you push to the master branch Heroku will rebuild your app for you.
Enjoy your free hosting!
Follow me on social media:
Twitter
Instagram | Personal
Instagram | Developer
Linkedin
Youtube
How To Deploy A React App To Heroku
Source: https://dev.to/smithmanny/deploy-your-react-app-to-heroku-2b6f
Posted by: baumgriat2001.blogspot.com
0 Response to "How To Deploy A React App To Heroku"
Post a Comment